
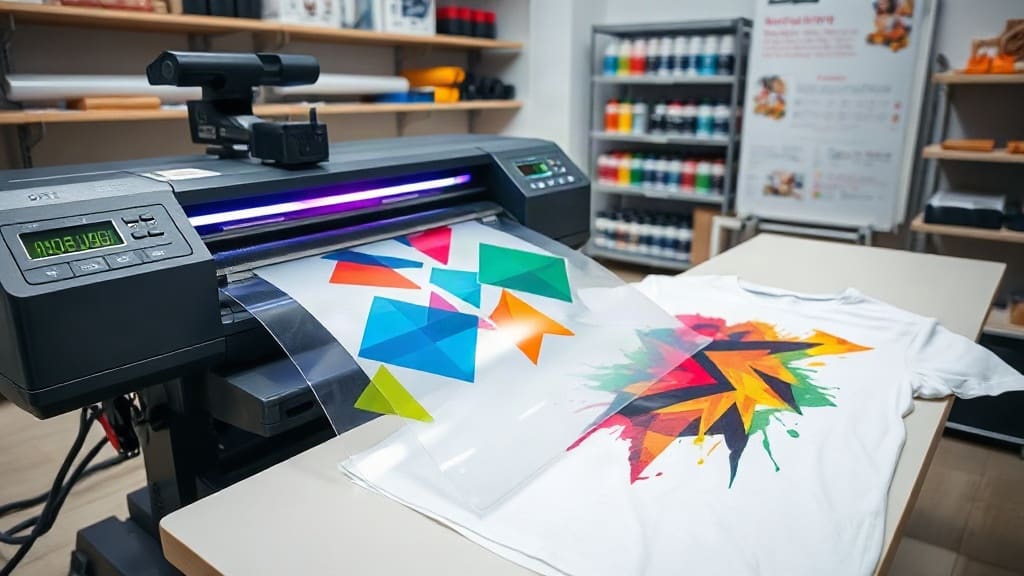
DTF transfers have taken the custom apparel industry by storm, offering a versatile and cost-effective way to create vibrant designs on various fabrics. Whether you're a small business owner or a printing enthusiast, understanding this technology is crucial. In this guide, we'll explore what makes DTF transfers so popular, the step-by-step process, and tips to achieve professional results.
What Are DTF Transfers?
Direct-to-Film (DTF) printing is a method where your design is printed onto a special film using a printer equipped with white ink and CMYK colors. The printed film is then coated with adhesive powder, which melts when heat is applied, allowing the design to adhere permanently to fabric. The result is a soft, durable, and highly detailed transfer that works on cotton, polyester, blends, and even nylon.
Unlike traditional screen printing, DTF transfers don't require screens or complex setup. They are perfect for on-demand printing, small batches, and full-color designs with gradients and intricate details.
Why Choose DTF Transfers?
The rise of DTF transfers is no accident. Here are some key advantages that make them a preferred choice:
- Versatility: You can print on almost any fabric, including dark and light colors without pretreatment.
- Softness: The prints have a soft hand feel, unlike heavy plastisol inks.
- Durability: They withstand multiple washes without cracking or fading.
- Cost-Effective: No minimum order quantities, making it ideal for custom orders and startups.
- Ease of Use: The process is straightforward and requires minimal training.
The DTF Transfer Process Step by Step
Mastering the process ensures consistent, high-quality results. Here is how you can produce flawless DTF transfers:
Step 1: Prepare Your Design
Use design software like Adobe Illustrator or Photoshop to create your artwork. Ensure it's in high resolution (at least 300 DPI) and in the correct color mode (RGB for digital printing). If your design includes text, convert it to outlines to avoid font issues.
Step 2: Print onto DTF Film
Load the DTF film into your printer. The film has a printable side and a backing. Print your design mirrored if you plan to apply the film with the ink side down. The printer should be equipped with white ink for base layers. Print a white base underneath the CMYK ink for designs intended for dark garments.
Step 3: Apply Adhesive Powder
After printing, while the ink is still wet, cover the entire printed area with hot-melt adhesive powder. This powder is what bonds the design to the fabric. Shake off the excess and ensure an even coating.
Step 4: Cure the Powder
Place the printed film in a curing oven or use a heat press to gently heat the powder until it melts and becomes translucent. This step is crucial; under-curing leads to poor adhesion, while over-curing can cause the film to warp. Typically, you'll need around 120°C for 2-3 minutes, but follow your manufacturer's instructions.
Step 5: Cut the Transfer
Once cooled, cut out your designs using scissors or a plotter. If you have multiple designs on one sheet, separate them now to make application easier.
Step 6: Press onto the Garment
Preheat your heat press to about 160°C. Place the garment on the press and position the transfer with the film side up (if you printed mirrored) or down (if you printed correctly). Apply firm pressure for 10-15 seconds. Peel the film while it's still warm or cold, depending on the type of film you use. Most DTF films require hot peeling for best results.
Step 7: Post-Press
After peeling, place a protective sheet like parchment paper over the design and press again for about 5 seconds to ensure full adhesion and enhance durability.
Equipment and Materials You Need
To start with DTF, you'll need specific equipment. Here's a basic list:
- DTF printer (or a converted Epson printer with pigment inks and white ink)
- DTF film (PET film)
- Adhesive powder
- Heat press
- Shaker and curing oven (or you can use a heat press with a tray)
- Scissors or a plotter for cutting
While the initial investment may be higher than other methods, the long-term savings and flexibility outweigh the costs, especially if you plan to scale your business.
Tips for Perfect DTF Transfers
Even with the right equipment, small mistakes can ruin your prints. Here are expert tips to avoid common pitfalls:
Calibrate Your Printer Regularly
Nozzle clogs are the bane of DTF printing. Run nozzle checks daily and perform cleanings as needed. Use high-quality inks to prevent clogging and ensure vibrant colors.
Use the Right Film for Your Printer
Not all films are compatible with every printer. Check the specifications and test small batches first. A good film should have excellent ink absorption and a smooth release.
Control Humidity and Temperature
DTF printing is sensitive to environmental conditions. High humidity can cause powder to clump and affect print quality. Keep your workspace at around 50% relative humidity and moderate temperatures.
Preserve Your White Ink
White ink is thicker and more prone to settling. Always shake the cartridges regularly and use a circulation system if available. If your printer has a maintenance mode, run it frequently.
Test Before Bulk Production
Before starting a large order, always do a test print and apply it to a sample fabric. This ensures colors are accurate and adhesion is perfect.
DTF vs. Other Printing Methods
Understanding how DTF compares to other methods helps you choose the right technology for your needs.
DTF vs. DTG (Direct-to-Garment)
DTG is great for detailed designs on cotton, but it requires a pretreated garment and is slower for bulk orders. DTF transfers, on the other hand, are faster for multiple items and work on various fabrics, including polyester, which DTG struggles with.
DTF vs. Screen Printing
Screen printing is cost-effective for large quantities but has a high setup cost and limited color variations. DTF offers full-color prints without setup fees, making it suitable for small to medium runs.
DTF vs. Vinyl Heat Transfer
Vinyl is limited to solid colors and cannot achieve photographic details. DTF can reproduce gradients and complex graphics with ease, and the prints are more durable.
Applications of DTF Transfers
One of the biggest selling points of DTF is its versatility. You can use it for:
- Custom t-shirts, hoodies, and sweatshirts
- Sportswear and athletic apparel
- Work uniforms and corporate merchandise
- Bags, hats, and accessories
- Personalized gifts and promotional items
Because you can print on demand, you can offer unique, one-off designs without inventory risk.
Common Mistakes to Avoid
Learning from others' errors saves you time and money. Here are frequent mistakes beginners make:
Incorrect Color Settings
If your colors look washed out, you might be printing in CMYK instead of RGB, or your ICC profile is wrong. Always calibrate your monitor and use the correct profile for your printer.
Overlooking the Mirror Printing
Forgetting to mirror your design results in reversed text and images. Always double-check before pressing.
Poor Powder Application
Uneven powder leads to patchy adhesion. Use a shaker to distribute evenly and shake off excess thoroughly.
Peeling Too Early or Too Late
Each film has specific peeling instructions. Some are hot-peel, others cold-peel. Follow the manufacturer's guidelines to avoid lifting the ink.
Frequently Asked Questions
Can DTF transfers be used on dark-colored garments?
Yes, absolutely. Because the printer lays down a white base, DTF transfers are perfect for dark fabrics. The white layer ensures that your colors pop and remain true to the original design.
How many washes can DTF transfers withstand?
With proper application, DTF transfers can withstand over 50 washes without significant fading or cracking. Washing inside out in cold water and air drying will extend the life of the print.
Do I need to pre-treat the fabric before applying DTF transfers?
No, that's one of the advantages of DTF. Unlike DTG, there is no need for pre-treatment. The adhesive powder bonds directly to the fabric fibers, ensuring a strong hold.
What is the shelf life of printed DTF film?
If stored in a cool, dry place away from direct sunlight, printed DTF transfers can last for months. However, it's best to use them within a few weeks to ensure optimal adhesion.
Can I use DTF transfers on materials other than fabric?
While primarily designed for fabrics, DTF transfers can also be applied to hard surfaces like wood, glass, and metal if you use a special adhesive. However, the results may vary, and it's recommended to test first.
Conclusion
DTF transfers are a revolutionary solution in the world of custom printing. They offer versatility, durability, and ease of use that traditional methods can't match. By following the steps and tips outlined in this guide, you can produce stunning prints that will delight your customers and grow your business. Whether you're just starting or looking to expand your services, DTF technology is a smart investment. Embrace the future of printing and start creating with DTF today.